This document presents a complete, production-grade deployment workflow for a NestJS backend application. The stack is intentionally traditional and infrastructure-conscious. We are avoiding the complexity of Kubernetes or Docker for this specific use case.
No container abstraction. No orchestration layer. Just a disciplined Unix-style deployment pipeline. Small surface area, predictable behavior, explicit control.
A NestJS backend in production is not simply a Node process listening on a public interface. That would be operational optimism at best.
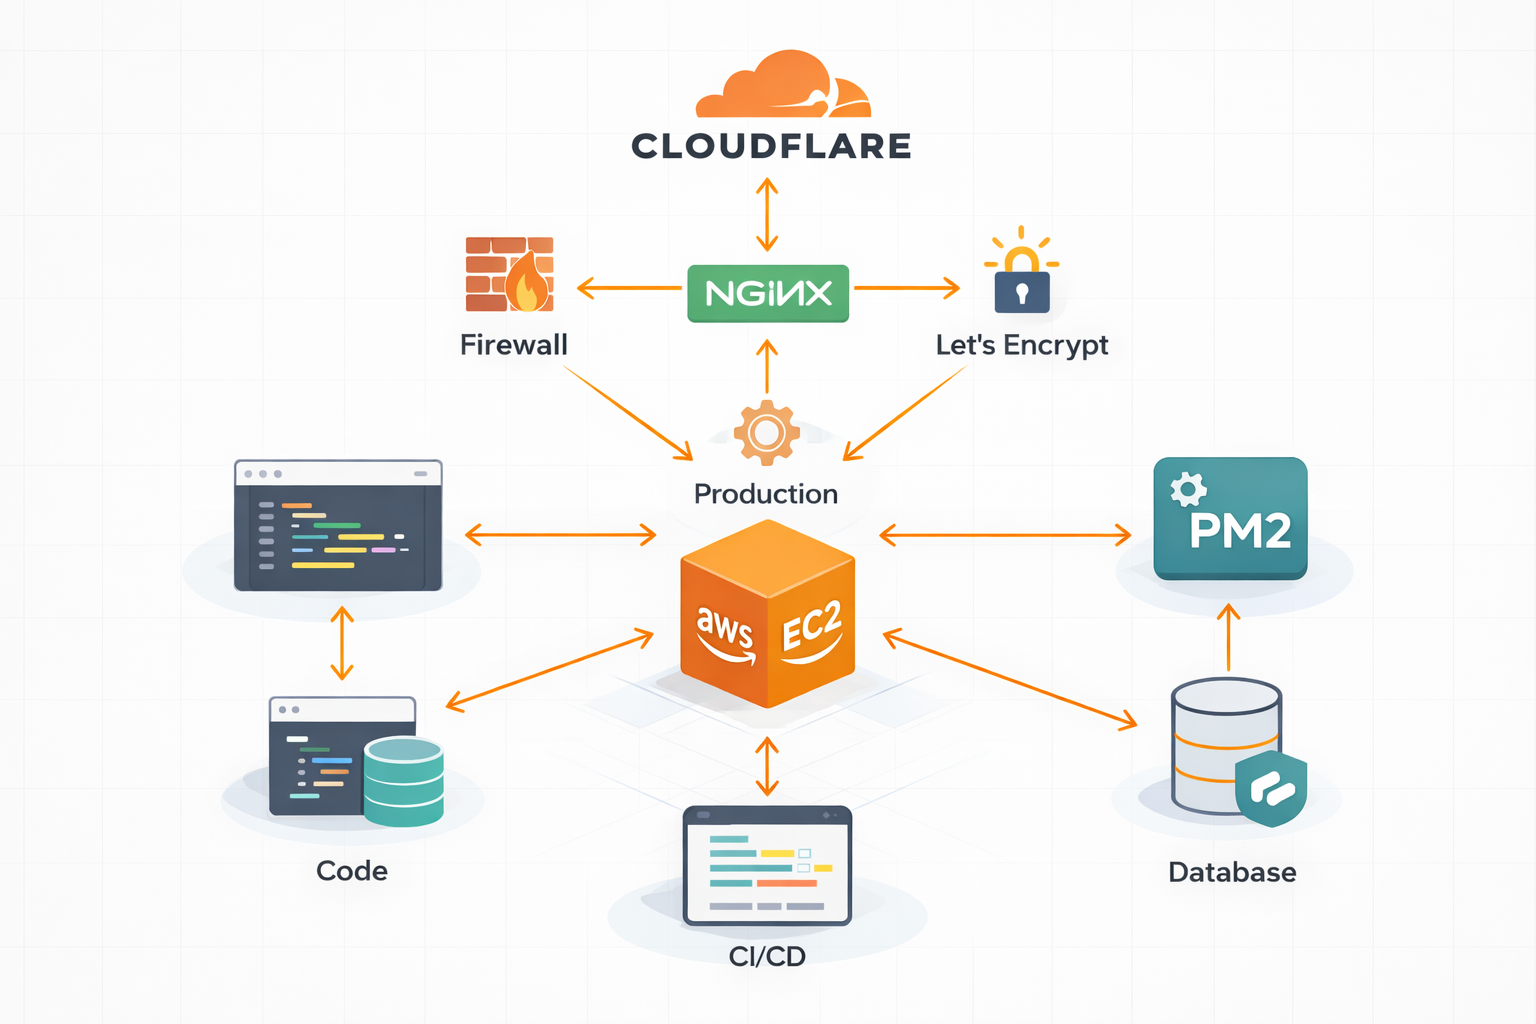
Each component in this stack serves a specific systems role:
NestJS: Handles application logic.
PM2: Ensures process continuity and supervised restarts.
Nginx: Terminates TLS and isolates the application from the public network.
Let's Encrypt: Provides automated certificate issuance and renewal.
Cloudflare: Adds DDoS mitigation, bot filtering, and origin shielding. (Also, I used it because the domain was already there, haha!)
GitHub Actions: Enforces deterministic builds and repeatable deployment.
Defense in depth. Layered responsibility. and I like it this way, well docker would have been better but as didn't have time to create a docker file, i continued as it is :)
In this architecture, the EC2 instance is not responsible for compiling the NestJS application. It does not run pnpm build, it does not transpile TypeScript, and it does not carry development tooling. The build phase occurs entirely inside GitHub Actions.
Below is the refined script. It includes fixes for common pitfalls encountered during implementation (specifically regarding nvm sourcing in SSH sessions and correct entry points).
Pre-requisites:
In your GitHub Repo > Settings > Secrets and Variables, add:
EC2_HOST: Your Elastic IP
EC2_USER: Usually ubuntu
EC2_KEY: Your private SSH key content, get by cating the pem file, opening in editer might not work.
Add Record: In Cloudflare DNS, create an A Record.
Name:api
IP: Your EC2 Elastic IP
Proxy: Enabled (Orange Cloud) // initially can be left and once we verify we getting it in v6, we can enable it back.
Verify Propagation:
dig api.yourdomain.com +short
The IPs returned should be Cloudflare ranges, not your EC2 IP. If you still see your EC2 IP, it's DNS caching. Wait a few minutes or flush your local DNS.
At this point, traffic flow is: Client → Cloudflare → Nginx → NestJS.
Currently, our backend is on HTTP. We need to encrypt it. Since Cloudflare is proxying, we have two options for SSL. We will terminate SSL at the Origin (EC2) using Let's Encrypt for full control, while Cloudflare handles the edge SSL.
Cloudflare proxy hides the IP from public DNS queries, but AWS Security Groups still allow direct access to the EC2 IP. If someone finds your IP, they can bypass Cloudflare's WAF.
Update AWS Security Group:
Go to EC2 Console → Security Groups.
Edit Inbound Rules for HTTP (80) and HTTPS (443).
Change Source from 0.0.0.0/0 to Cloudflare IP Ranges.
You can find the current ranges here: https://www.cloudflare.com/ips/
(Or keep it open if you prefer simplicity, but restricting it is "Security by Design").
Result: Only Cloudflare can reach your origin. Direct access attempts via the EC2 IP will fail.
A backend in production is not about frameworks. It is about process boundaries, network layering, and predictable runtime behavior, right ?, well maybe, you dont have to belive it.
PM2 keeps the process alive.
Nginx isolates the application.
Let's Encrypt automates trust.
Cloudflare absorbs chaos.
CI/CD eliminates drift.
Simple stack. Strong guarantees. No magic, just mechanics.